Docs
Getting Started
Sedulous is a code-first engine – you build scenes, entities, and game logic entirely in code. No editor is required. This guide walks through creating your first application: a window with a 3D scene, a camera, and a lit object.
Prerequisites
Before you begin, install the following:
BeefIDE
Sedulous is written in Beeflang. Download and install the latest nightly build from nightly.beeflang.org. The nightly includes the compiler, debugger, and IDE with the latest language features and fixes that Sedulous depends on.
Vulkan SDK (recommended)
If using the Vulkan backend (recommended), install the Vulkan SDK from LunarG. Minimum Vulkan 1.3 required. The SDK provides the Vulkan loader, validation layers, and shader tools.
After installation, verify Vulkan 1.3+ is available by running vulkaninfo from a terminal.
Note: The DX12 backend is also available on Windows but Vulkan is recommended for development as it provides better validation layer diagnostics.
Engine Workspace
Clone the Sedulous engine repository:
git clone https://github.com/SedulousWorks/SedulousEngine.git
Open the workspace in BeefIDE:
- Launch BeefIDE
- File > Open > Open Workspace
- Select
SedulousEngine/Code/folder (which containsBeefSpace.toml)
The workspace contains all engine libraries, dependencies, and samples organized in workspace folders. The solution explorer (left panel) shows the project tree.
To verify everything works, set the startup project to EngineSandbox (right-click > Set as Startup Project in the solution explorer) and press F5 to build and run. You should see a 3D scene with a lit cube, animated fox, and particle effects.
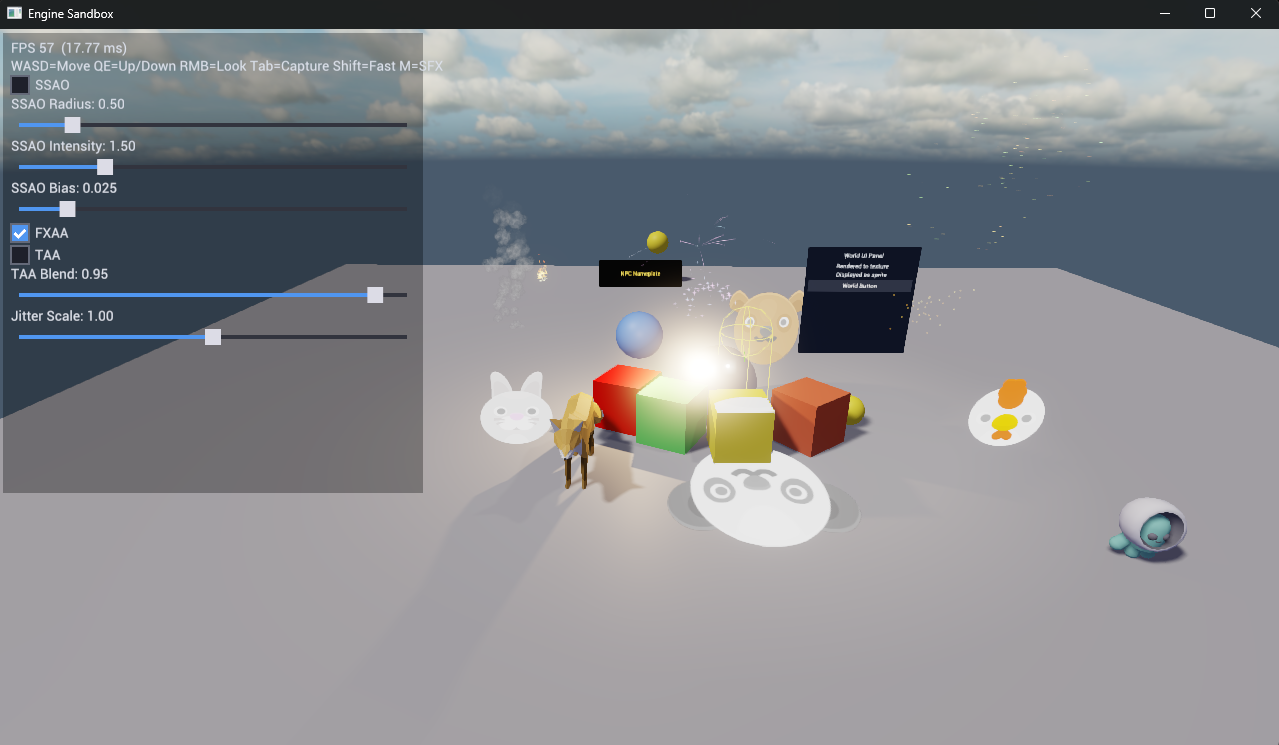
The samples (EngineSandbox, Showcase, TowerDefense) are good starting points to study.
Creating a New Project
Your game project lives inside the Sedulous workspace. The recommended location is SedulousEngine/Code/Samples/MyGame (or wherever you prefer under the workspace).
- In BeefIDE, right-click the workspace root in the solution explorer
- Select Add New Project
- Name it (e.g.,
MyGame), set Target Type to Console Application - Choose a location (e.g.,
Samples/MyGame) - The project is created with a
BeefProj.tomland asrc/folder
Dependencies
Add the engine dependencies to your project:
- Right-click your project (e.g.,
MyGame) in the solution explorer - Select Properties
- Go to the Dependencies tab
- Tick the following:
Sedulous.Engine.AppSedulous.Images.STB
Sedulous.Engine.App pulls in everything else transitively (RHI backends, rendering, scene system, physics, audio, mathematics, resources, etc.). You only need to explicitly add libraries that aren’t already dependencies of Engine.App – in this case, Images.STB for the image loader.
Assets Directory
The engine discovers an Assets folder by searching upward from the working directory. The folder must contain a .assets marker file. The engine’s own SedulousEngine/Assets/ directory already has this – your project uses it automatically when run from within the workspace.
Creating Source Files
Create two source files in your project:
- Right-click your project (e.g.,
MyGame) in the solution explorer - Select Add File
- Enter
Programas the class name – this createssrc/Program.bf - Repeat and enter
MyGameApp– this createssrc/MyGameApp.bf
MyGameApp.bf
The engine uses EngineApplication as the base class for all applications. Override its lifecycle methods to configure and run your game.
using Sedulous.Engine.App;

namespace MyGame;

class MyGameApp : EngineApplication
{
    protected override void OnStartup()
    {
        // Set up your scene here
    }
}
Program.bf
The entry point creates and runs the application with settings:
using System;

namespace MyGame;

class Program
{
    static int Main(String[] args)
    {
        let app = scope MyGameApp();
        return app.Run(.() {
            Title = "My Game",
            Width = 1280,
            Height = 720
        });
    }
}
Application Lifecycle
EngineApplication provides these virtual methods, called in order:
| Method | When | Purpose |
|---|---|---|
OnConfigure(Context) |
Before subsystem startup | Register custom subsystems |
OnStartup() |
After all subsystems initialized | Create scenes, load resources, set up entities |
OnUpdate(float deltaTime) |
Every frame | Game logic |
OnShutdown() |
Before cleanup | Release resources |
The engine handles device creation, swap chain, frame pacing, and presentation automatically. You don’t need to manage the render loop.
The engine manages a set of subsystems (rendering, physics, audio, etc.) that you can access when needed:
let sceneSub = Context.GetSubsystem<SceneSubsystem>();
let audioSub = Context.GetSubsystem<AudioSubsystem>();
For details on the subsystem architecture and how to create your own, see Engine Architecture.
Initializing Image Loaders
Before loading any textures or models, register at least one image loader. This is typically done at the start of OnStartup():
using Sedulous.Images.STB;

protected override void OnStartup()
{
    STBImageLoader.Initialize();
    // ...
}
STB handles .png, .jpg, .tga, .bmp, and .hdr formats. For additional format support, add Sedulous.Images.SDL:
using Sedulous.Images.SDL;

SDLImageLoader.Initialize();
Creating a Scene
Scenes are created through the SceneSubsystem. Each scene gets its own set of component managers, injected automatically by engine subsystems (rendering, physics, animation, etc.) via the ISceneAware interface.
Add the following inside MyGameApp.OnStartup(), after the image loader initialization:
let sceneSub = Context.GetSubsystem<SceneSubsystem>();
mScene = sceneSub.CreateScene("Main");
You’ll also need these usings at the top of MyGameApp.bf:
using Sedulous.Engine.Core;
using Sedulous.Engine;
And add a field to store the scene: private Scene mScene;
All the code in the following sections goes inside OnStartup() after the scene is created. The usings shown with each snippet go at the top of the file.
Creating Entities
Entities are lightweight handles in the scene. They have a transform (position, rotation, scale) and can hold components. You create them via mScene.CreateEntity() and set their transform with mScene.SetLocalTransform().
We’ll create our first entities in the sections below – a camera, a light, and meshes.
Adding a Camera
Every scene needs at least one camera to render. Create an entity, then add a CameraComponent via the camera manager (add using Sedulous.Engine.Render; at the top):
let cam = mScene.CreateEntity("Camera");
mScene.SetLocalTransform(cam, Transform.CreateLookAt(.(0, 4, 8), .(0, 0, 0)));
let cameraMgr = mScene.GetModule<CameraComponentManager>();
if (let c = cameraMgr.Get(cameraMgr.CreateComponent(cam)))
{
    c.IsActive = true;
    c.FieldOfView = 60;
}
Adding a Light
Without a light, the scene renders black. Add a directional light (add using Sedulous.Core.Mathematics; at the top for Quaternion):
let sun = mScene.CreateEntity("Sun");
mScene.SetLocalTransform(sun, .() {
    Position = .(0, 10, 0),
    Rotation = Quaternion.CreateFromYawPitchRoll(0.5f, -1.0f, 0),
    Scale = .One
});
let lightMgr = mScene.GetModule<LightComponentManager>();
if (let l = lightMgr.Get(lightMgr.CreateComponent(sun)))
{
    l.Type = .Directional;
    l.Intensity = 1.5f;
    l.CastsShadows = true;
}
Adding Meshes
To display 3D objects, create mesh resources and attach them to entities via MeshComponentManager. Add using Sedulous.Geometry.Resources; and using Sedulous.Resources; at the top.
First, a ground plane:
let planeRes = StaticMeshResource.CreatePlane(10, 10, 1, 1);
defer planeRes.ReleaseRef();
ResourceSystem.AddResource<StaticMeshResource>(planeRes);
let ground = mScene.CreateEntity("Ground");
let meshMgr = mScene.GetModule<MeshComponentManager>();
if (let m = meshMgr.Get(meshMgr.CreateComponent(ground)))
{
    var r = ResourceRef(planeRes.Id, .());
    defer r.Dispose();
    m.SetMeshRef(r);
}
Then a cube sitting on it:
let cubeRes = StaticMeshResource.CreateCube();
defer cubeRes.ReleaseRef();
ResourceSystem.AddResource<StaticMeshResource>(cubeRes);
let cube = mScene.CreateEntity("Cube");
mScene.SetLocalTransform(cube, .() {
    Position = .(0, 0.5f, 0), Rotation = .Identity, Scale = .One
});
if (let m = meshMgr.Get(meshMgr.CreateComponent(cube)))
{
    var r = ResourceRef(cubeRes.Id, .());
    defer r.Dispose();
    m.SetMeshRef(r);
}
Components reference resources via ResourceRef – a GUID + path pair. For programmatic resources (created in code and added via ResourceSystem.AddResource), use the resource’s GUID with an empty path: ResourceRef(resource.Id, .()). For file-based resources, use the protocol path: ResourceRef(.Empty, "project://models/hero.mesh").
ResourceRef owns a heap-allocated string, so it needs to be disposed when you’re done. The defer pattern handles this. The component’s SetMeshRef makes its own copy, so the original can be disposed immediately.
Meshes without an explicit material use a default white PBR material. The cube will appear as a white lit surface.
Adding Materials
To give objects color, create a base PBR material and material instances. Add using Sedulous.Materials; at the top.
First, add fields to MyGameApp for lifetime management:
Material mPbrMaterial ~ delete _;
MaterialInstance mGroundMaterial ~ _?.ReleaseRef();
MaterialInstance mCubeMaterial ~ _?.ReleaseRef();
Then after the mesh setup code, create the materials and assign them:
let renderSub = Context.GetSubsystem<RenderSubsystem>();
let matSystem = renderSub.RenderContext.MaterialSystem;

mPbrMaterial = Materials.CreatePBR("PBR", "forward",
    matSystem.WhiteTexture, matSystem.DefaultSampler);

mGroundMaterial = new MaterialInstance(mPbrMaterial);
mGroundMaterial.SetColor("BaseColor", .(0.4f, 0.4f, 0.4f, 1));

mCubeMaterial = new MaterialInstance(mPbrMaterial);
mCubeMaterial.SetColor("BaseColor", .(0.9f, 0.2f, 0.2f, 1));
mCubeMaterial.SetFloat("Roughness", 0.5f);
Assign them to the mesh components using SetMaterial:
if (let m = meshMgr.GetForEntity(ground))
    m.SetMaterial(0, mGroundMaterial);

if (let m = meshMgr.GetForEntity(cube))
    m.SetMaterial(0, mCubeMaterial);
The base Material is owned by the app and deleted on shutdown. MaterialInstance is ref-counted – the field destructor calls ReleaseRef(). SetMaterial on the component AddRefs the instance, so both the component and the app hold a ref.
Setting Up Render Settings
Scene-level render settings (ambient light, exposure) are configured via RenderSceneModule:
if (let rs = mScene.GetModule<RenderSceneModule>())
{
    rs.AmbientColor = .(0.1f, 0.1f, 0.15f);
    rs.Exposure = 1.0f;
}
Complete Example
Putting it all together – here’s what your two files should look like:
MyGameApp.bf
using System;
using Sedulous.Engine.App;
using Sedulous.Engine.Core;
using Sedulous.Engine.Render;
using Sedulous.Engine;
using Sedulous.Core.Mathematics;
using Sedulous.Geometry.Resources;
using Sedulous.Resources;
using Sedulous.Materials;
using Sedulous.Images.STB;

namespace MyGame;

class MyGameApp : EngineApplication
{
    private Scene mScene;
    private Material mPbrMaterial ~ delete _;
    private MaterialInstance mGroundMaterial ~ _?.ReleaseRef();
    private MaterialInstance mCubeMaterial ~ _?.ReleaseRef();

    protected override void OnStartup()
    {
        STBImageLoader.Initialize();

        let sceneSub = Context.GetSubsystem<SceneSubsystem>();
        mScene = sceneSub.CreateScene("Main");

        // Camera
        let cam = mScene.CreateEntity("Camera");
        mScene.SetLocalTransform(cam, Transform.CreateLookAt(.(0, 4, 8), .(0, 0, 0)));
        let cameraMgr = mScene.GetModule<CameraComponentManager>();
        if (let c = cameraMgr.Get(cameraMgr.CreateComponent(cam)))
        {
            c.IsActive = true;
            c.FieldOfView = 60;
        }

        // Light
        let sun = mScene.CreateEntity("Sun");
        mScene.SetLocalTransform(sun, .() {
            Position = .(0, 10, 0),
            Rotation = Quaternion.CreateFromYawPitchRoll(0.5f, -1.0f, 0),
            Scale = .One
        });
        let lightMgr = mScene.GetModule<LightComponentManager>();
        if (let l = lightMgr.Get(lightMgr.CreateComponent(sun)))
        {
            l.Type = .Directional;
            l.Intensity = 1.5f;
            l.CastsShadows = true;
        }

        // Materials
        let renderSub = Context.GetSubsystem<RenderSubsystem>();
        let matSystem = renderSub.RenderContext.MaterialSystem;

        mPbrMaterial = Materials.CreatePBR("PBR", "forward",
            matSystem.WhiteTexture, matSystem.DefaultSampler);

        mGroundMaterial = new MaterialInstance(mPbrMaterial);
        mGroundMaterial.SetColor("BaseColor", .(0.4f, 0.4f, 0.4f, 1));

        mCubeMaterial = new MaterialInstance(mPbrMaterial);
        mCubeMaterial.SetColor("BaseColor", .(0.9f, 0.2f, 0.2f, 1));
        mCubeMaterial.SetFloat("Roughness", 0.5f);

        // Ground plane
        let planeRes = StaticMeshResource.CreatePlane(10, 10, 1, 1);
        defer planeRes.ReleaseRef();
        ResourceSystem.AddResource<StaticMeshResource>(planeRes);
        let ground = mScene.CreateEntity("Ground");
        let meshMgr = mScene.GetModule<MeshComponentManager>();
        if (let m = meshMgr.Get(meshMgr.CreateComponent(ground)))
        {
            var r = ResourceRef(planeRes.Id, .());
            defer r.Dispose();
            m.SetMeshRef(r);
            m.SetMaterial(0, mGroundMaterial);
        }

        // Cube
        let cubeRes = StaticMeshResource.CreateCube();
        defer cubeRes.ReleaseRef();
        ResourceSystem.AddResource<StaticMeshResource>(cubeRes);
        let cube = mScene.CreateEntity("Cube");
        mScene.SetLocalTransform(cube, .() {
            Position = .(0, 0.5f, 0), Rotation = .Identity, Scale = .One
        });
        if (let m = meshMgr.Get(meshMgr.CreateComponent(cube)))
        {
            var r = ResourceRef(cubeRes.Id, .());
            defer r.Dispose();
            m.SetMeshRef(r);
            m.SetMaterial(0, mCubeMaterial);
        }

        // Render settings
        if (let rs = mScene.GetModule<RenderSceneModule>())
        {
            rs.AmbientColor = .(0.1f, 0.1f, 0.15f);
            rs.Exposure = 1.0f;
        }
    }
}
Program.bf
using System;

namespace MyGame;

class Program
{
    static int Main(String[] args)
    {
        let app = scope MyGameApp();
        return app.Run(.() {
            Title = "My Game",
            Width = 1280,
            Height = 720
        });
    }
}
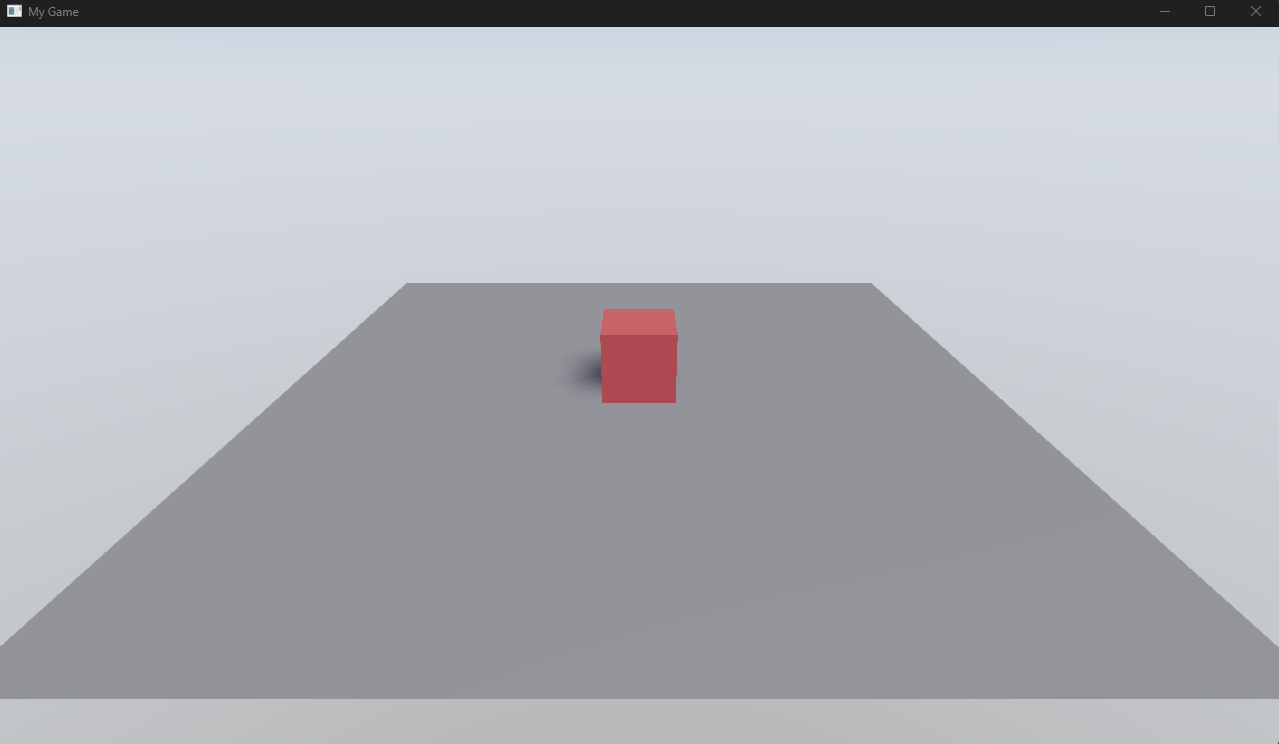
Set your project as the startup project (right-click > Set as Startup Project) and press F5. You should see a red cube sitting on a gray ground plane, lit by a directional light with shadows. The camera looks down at the scene from an angle.
Note: The first run may be slow due to shader compilation. Subsequent runs use cached shaders and start much faster.
From here, try changing values – move the cube, change the light color, add more entities. The samples in the workspace (EngineSandbox, Showcase) demonstrate more advanced features.
Next Steps
- Scenes and Entities – entity hierarchy, transforms, component lifecycle
- Resources – loading meshes, textures, materials from files
- Rendering – cameras, lights, materials, post-processing